Thursday, August 29, 2013

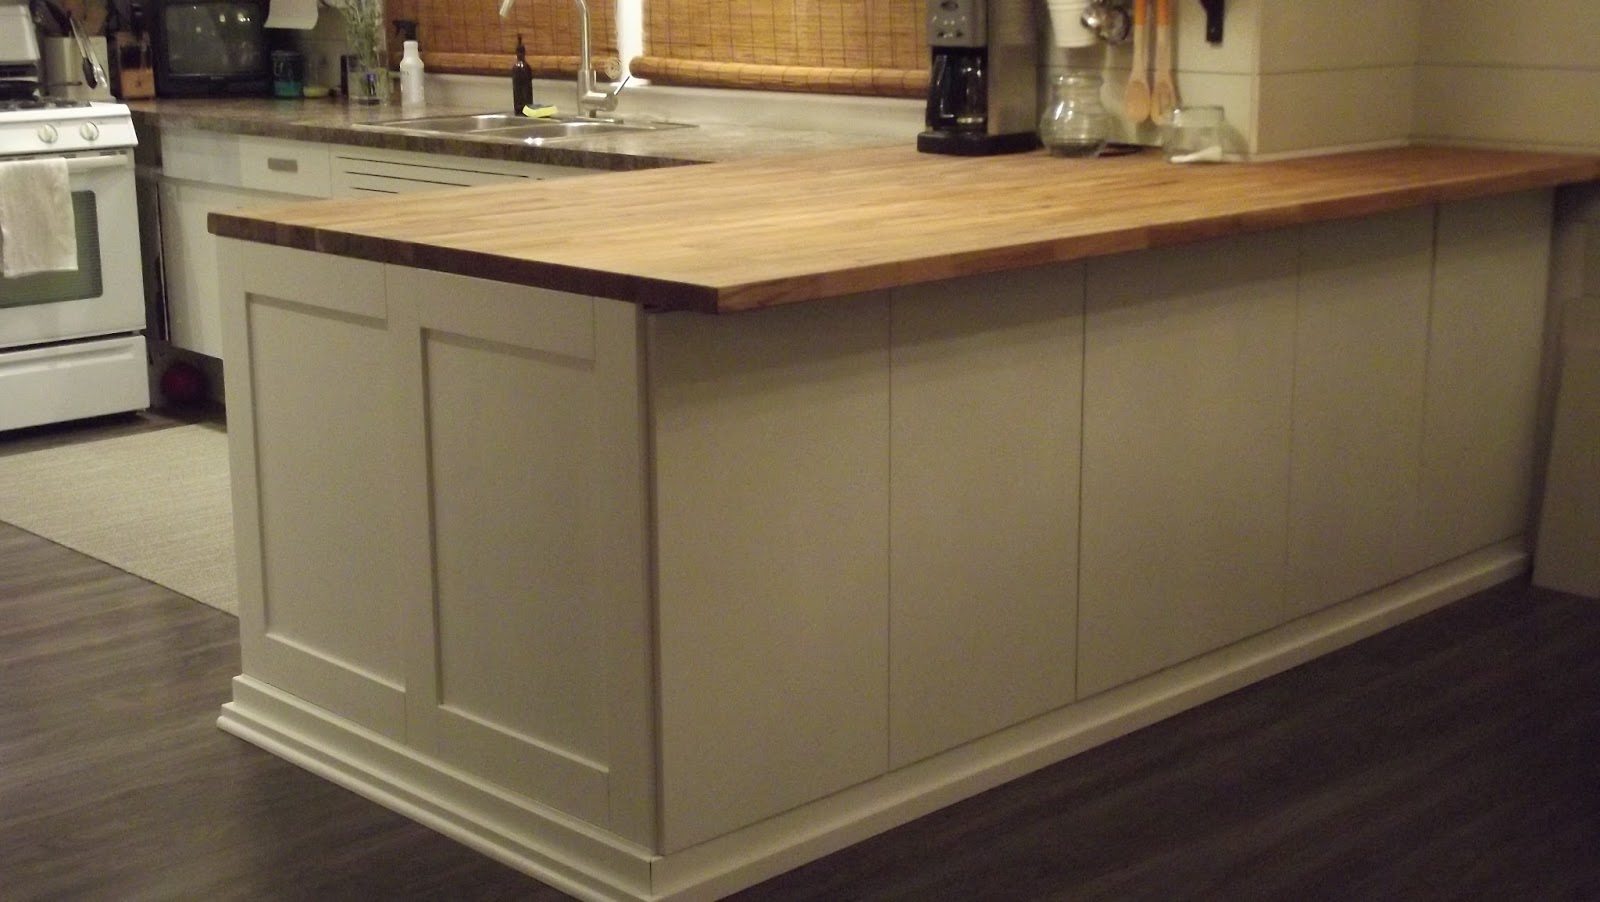
DIY Butcher Block Kitchen Island (Before and After)

I just spent 72 hours writing the LONGEST post ever about this kitchen island and I lost. every. single. word.  Every last one.

I think Jack's most recent school photo accurately sums up how I feel right now.


<deep breath>

So, let's take that as a sign to just skip to the before and after, yes?

Before:


Not cool, Blogger.  Not cool at all.

Monday, August 26, 2013

I Imagined That Going Differently

On Sunday morning, Jack opened his birthday presents from his family.  One of them was an alarm clock that was going to go in his new big-boy room.  I decided to wait and ask him if he would like to have a new bedroom before I just made that (big) decision for him.  He's been talking about it constantly, so I knew what he was going to say.

"Jack, I want to ask you something very important:  Would you like to have your own room?  We can move all of your things in this morning, if you like?"

Jack thought carefully for a moment.  Looked at his little brother and said, "No.  I don't think Sam's ready."

The night before, they stayed up until the wee hours with nightlights on and small chitterchatter filling the room.  Jack reading books to Sam and Sam returning the favor with cuddles and an annoying poke here and there.

Again and again, I'm reminded of this sweet quote:

(via)

And so I did.


Friday, August 16, 2013

A Bedroom For A Boy - Progress

When we last spoke, the bedroom in question was looking a LOT like this:


<sigh>

I've been watching episodes of 'Hoarders - Buried Alive' just to prove to myself that I didn't have a problem.  This room has had become the catch-all throughout the renovation process.  A life-size junk drawer, if you will.  Someone's coming over to visit?  No problem!  Open the door, literally throw something in, shut the door.

No more.....


That, my friends, is the result of six billion flights of stairs.  Almost every single thing in this upstairs bedroom belonged in the basement.  A basement that needed to be reorganized in order to accept the influx of *stuff* that I was about to introduce.  So, not only did I need to clean out the entire basement, I needed to clear out this room, as well.  You'd think I would have thinner thighs by now...

In order to get to this point, here's what had to happen:
  • Trim out the windows
  • Caulk all trim around said windows
  • Paint the jambs and trim
  • Two coats of Benjamin Moore 'Revere Pewter' mixed in Behr Premium Plus, eggshell finish
  • Install baseboards and craftsman-style door casings
And that's where I'm at.  I have seven days before this puppy needs to be birthday-boy ready.  Here's what's left:
  • Caulk and paint floor and door trim 
  • Hang artwork
  • Decide on room layout
  • Bring in furniture (desk, shelves, night table, lamps, etc)
The shelving that you see in the room right now is simple, cost-effective (read: super-cheap) shelving from Ikea.  Once assembled, it looks like this:

Once you spend an hour in the hot garage with a can of brain-cell diminishing dark walnut stain, it looks like this:


I have a couple options as far as placement of the shelves go--- and I really don't know which one I prefer.  I can go one on either side of the window, like so:


Or, I can gang them up between two windows and they would be the first thing you see when you walk up the stairs or past the door:


I think I kinda like them ganged together like this and I'm imagining white, soft, full curtains on either side of the windows to really lighten up this wall and create a welcoming effect.  However, once you bring in the bed where I wanted it, it doesn't leave much walking space:

The tape measure shows exactly how far the bed would extend.

The room has a funky, little bump-out that I was hoping to tuck the headboard into and extend into the room.


Now, excuse me while I dazzle you with my ARTISTIC rendering of Jack's bed in this space just to help you understand what I mean:


You're floored.  I know.  I gots mad Paint skillz.  Don't hate.

So that's where we are right now.  No decisions on room layout, but I'll get that figured out in the next couple days.  Any thoughts?  Recommendations?  Would you like me to offer tutorial classes on how to illustrate in MS Paint?

Monday, August 5, 2013

Snips and Snails and Puppy-Dog Tails (Designing An Awesome Boys' Room)

If you follow me on Pinterest, you'll notice that I've been pinning a lot of this:

(via)


and this:

(via)


oh, and then there's this:

(via)


and of course, let's not forget this:

(via)

You guys.  That last image.....  Wow.  I love it so much.  I don't know if it screams '7 year-old boy' though..... I might have to file it away for myself....

The thing that sticks out most for me in these inspiration photos is contrast.  Lots of soft blues and greys coupled with striking black and dark walnut.  And to lighten the space, bright, creamy white accents in the form of trim or draperies.

You see, I've got a little monkey who just so happens to be turning 7 this month.  When we originally designed the second floor, we added a guest room knowing that it would eventually be Jack's bedroom.  We figured the boys would duke it out in a shared bedroom until they were about 10 or so, and then want to spread their wings and go separate ways.

Not my kids.

They want FREEDOM!  INDIVIDUALITY!  THEIR OWN SPACE!  NOW, PLEASE!

I've decided to surprise Jack with his own room for his birthday.  Which just so happens to be in 20 days.  Now, I'm not expecting it to look exactly like those drool-worthy rooms up there in 20 days.  Especially considering that I'm currently working on finishing up the master ensuite, guest bathroom, kitchen and enough trim work to make me just want to just. give. up. right. now.

On top of all of that, the current space I'm working with looks like this:


Ugh.  That hurts.  Hurts bad.

Throughout the last year, whenever we've had to store something away for later or move items because we were working in a room, this is where it went.  And now it's back to haunt me.

BUT!  I've got a plan and I'm sticking to it.  Kind of.  Here's the master to-do for this space:
  • Clear out the room
  • Finish trimming out the windows and doors
  • Make a decision regarding whether to go basic wall trim or do a snazzy treatment
  • Paint
  • Window coverings/blinds/curtains
  • Install lighting


It will seriously be a miracle if I can get this done.  Little bites, Carol....little bites...

What about you?  Ever try to eat an elephant of this size in such a short time?  Got any inspiration photos?  Words of wisdom?

Wednesday, July 10, 2013

Tiling Shower Walls - a.k.a.: Instant Gratification

John wants me to call this blog, 'The House That Clearance Built'.  Not sure why......  could have something to do with this:


Or this:


Or possibly this:


But today, it has to do with this:


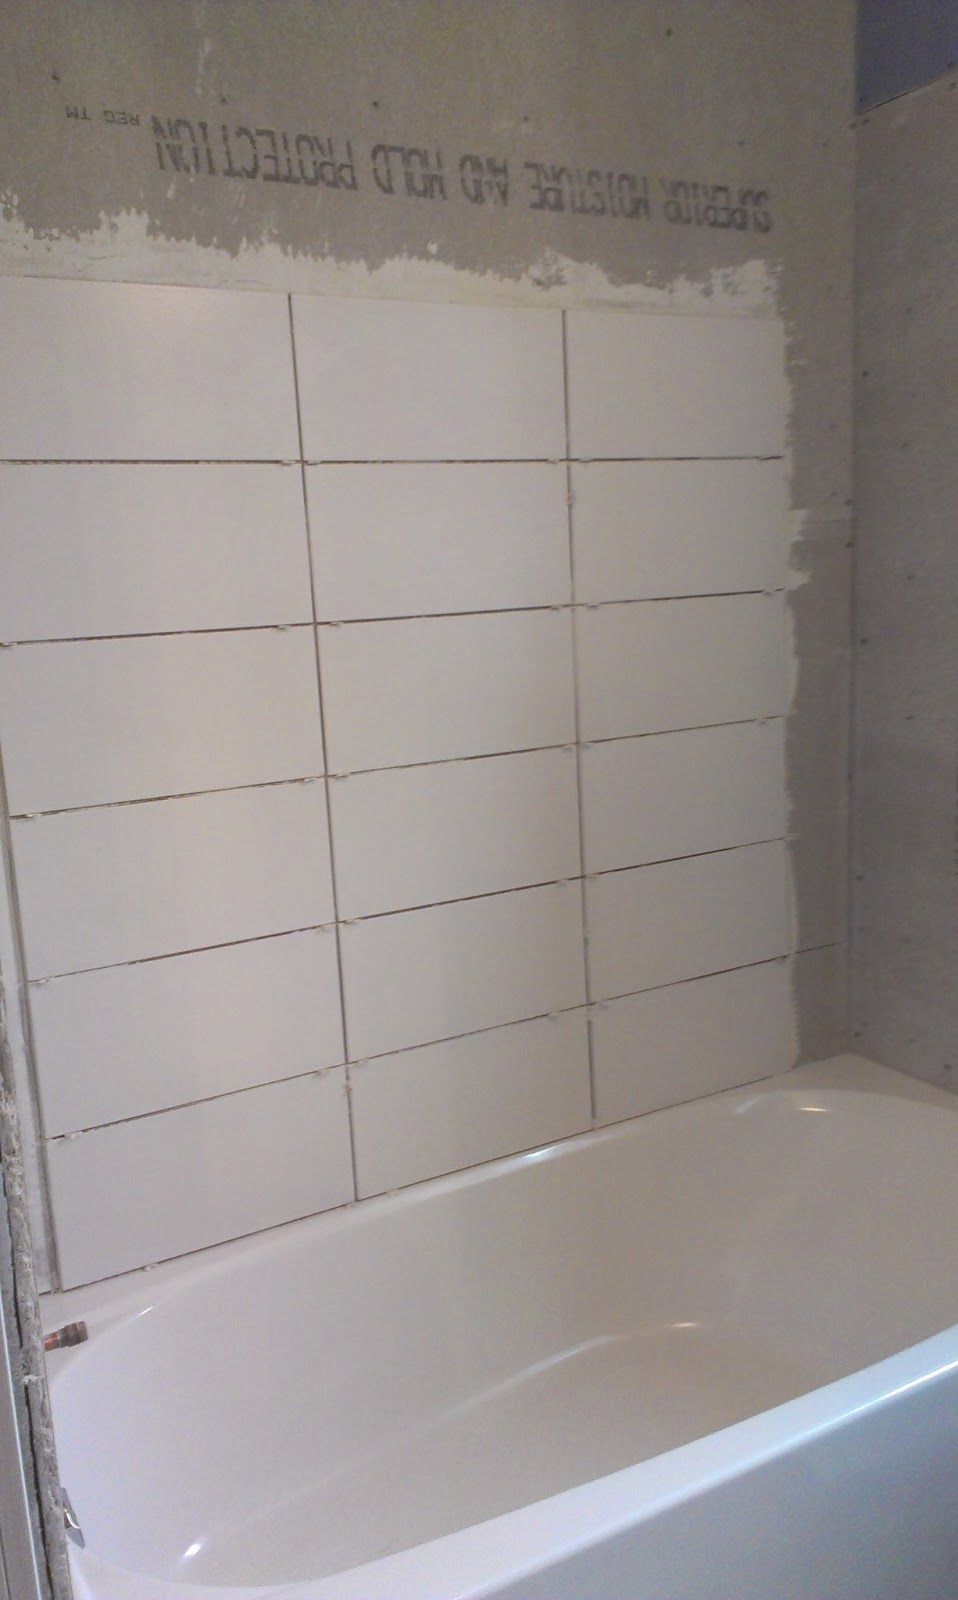
Yes.  Those are 8x16" textured tiles marked down from $4.12 to $1.00.  One dollar!  I was home, struggling with our new paint sprayer (as it turns out, I am *not* the 'paint whisperer' like I thought I might be) and John brought the boys out on a routine trip to the hardware store.  About 5 minutes later, I got a call  from him saying something to the effect of "Get here.  Now.  You're gonna wanna see this."

Oh, and I DID want to see that.

We were ALL OVER the sparkly, white tiles and we did some math and figured out about how much tile would be needed to do the guest bathroom shower walls.  There weren't enough tiles available in the clearance bin.  <sad song here>  Interestingly enough, there were some charcoal-ish grey tiles that were marked down and so we played around with a few patterns right there in the store and decided to go for it.

I've never tiled a shower wall before so to say I was a teeny, tiny bit intimidated would be an understatement.  I gathered all of my supplies, took a deep breath, and just dove right in.

I lined the bathtub with some leftover cardboard.
Hey look!  There's a level!
I start to get hives when things fall out of symmetry, so I marked my center line so I would know where to begin.  With white mortar, I mixed up a small batch to get started and spread a good layer of mortar onto the cement board with a notched trowel.  And proceeded to drop GIANT globs of thinset onto the cardboard-lined bathtub.

After a little while, I had this:


Talk about satisfaction.  I had been staring at that unfinished wall for a while and it felt so good to see it starting to take shape.  I let that first round of tiling set up for a while before I started on a grey band and the side walls.  Also, I ran out of white mortar and continued with grey mortar.  I figured that if I kept my joints somewhat clear, I wouldn't have too much of an issue with it coming through my white grout.


The corners required a quick snip on the tile cutter and for. the. love. of. pete. I kept chipping the edges of all of my cuts.  No matter what technique/method/wishful thinking I tried, the edges were chipping.  And I was quickly using up all of my 'just in case' tiles.  I ended up just taking the ones that were the least hacked up and using them - with the hopes that grout might help to cover up my sins.


Speaking of sins.

Remember how I said that I didn't think using the grey mortar would be that big of a deal?

It was a big deal.

I am neither neat, nor careful when it comes to mortar.  When I came back the next day, I had grey mortar crustily oozing out errwhere.  It was not in the least bit attractive.  And neither was the sight of me frantically trying to scrape out the surprisingly (?) cement-like bulges from all of my seams.  It was brutal.  And this was the best I could muster:


I was really and truly hoping that the grout gods would be forgiving and help me out with concealing this travesty forever and ever.  Amen.

They totally delivered.

This is just after applying the grout, hence the haze.
I have to say, I thought grouting would be way more fun.  It was stressful to me.  I was really concerned about the coverage and I suppose standing on the sides of the tub and reaching up as high as I could - overhead - didn't make it any more pleasurable.  I found that my hands were shaking and achy at the beginning, so I got some awesome (and handsome) assistance.


John jumped in and started grouting like a boss and I was able to follow from behind and make it pretty and uniform.  In the end, I'm pretty pleased with the result.


The finishing touch for this particular job was to add a bead of silicone to the perimeter of the tub where it meets the tile.  I had read that a good tip is to fill your bathtub prior to applying the silicone so that if there's any flex when the tub is full, you'll reduce any cracking or displacement of the silicone.

I placed a piece of scrap tile behind the running water to prevent any splashin' onto my pre-siliconed area.
A little bit of painter's tape and a nice, thick bead of silicone.


Remove the tape while the silicone is still wet and while the tub is still full and let that puppy sit for a while.


Once things are nice and set, drain the water and marvel at the awesomeness of it all.  I followed up a week later with some sealer and BOOM.


This is as clean as this bathtub will ever be.  Ever.

Saturday, May 11, 2013

To Tank Or Not To Tank.

(via)


A few months ago, Houzz.com featured an incredibly informative article geared toward people undergoing a whole-house remodel/renovation.  Some fantastic points were brought up, but there was one tip in particular about tankless water heaters that got me 'heated' up.  (How could I *not* go there?)

I'm embedding the article here because it was pretty sweet and it might help someone else in a similar situation.


Now..... on to the reason for this post.  Without a lot of research beforehand, we purchased a tankless water heater when we updated the furnace and air conditioning.  We were almost doubling our square footage and according to the HVAC peeps, we would need to upgrade our (already very old) units in order to pass the HVAC inspection and be up to code (I have my reservations on some of this information.  Do your research beforehand to be 100% sure).  Long story short: we thought that going with a tankless water heater, as opposed to our regular ol' run-of-the-mill tank water heater would be the fancy, dee-luxe apartment in the sky right thing to do.


Well.  Notsomuch.

Here's the edited and prettified version of my comments from the Houzz article.  Maybe they'll be informative for someone out there on the fence with whether or not to take the tankless plunge.

*****

"With regards to your first point ('Consider Water') I would *HIGHLY* suggest people do their homework on tankless water heaters. I chose a tankless heater based on all of the glowingawesomewonderfulunicorns! reviews I heard and I gotta say, I hate it. With a fervent passion. Like, I want to punch it. 

"Consider a separate tankless or tank heater for your second story, or a larger tank with a recirculation pump that keeps hot water right at your taps." 

Girl, word up to your mutha. 

In hindsight, I would have factored in a recirculation pump to my overall budget. But I didn't. So, for the time being, I deal with excessively cold water for excessively long periods while the tankless unit debates whether I deserve to wash my hands in warm water.

With regards to people saying that they're "much more" economical than the gas ones, I don't know how true that is. I think that in the long run, yes, you might save some money, but that's at the cost of: 

-your dishwasher not running properly due to the lack of immediate hot water 

-your laundry potentially not being cleaned properly. With two little boys at home, I have some MAJOR loads that need to be washed in HOT water. With high-efficiency washing machines that don't use much water to begin with, they certainly aren't getting up to temp to clean certain loads the way I'd like 

-unbelievable water waste. I used to turn on my shower and be able to hop in and adjust temp within about 5-10 seconds of having the water run down the drain. Now, whether I'm showering or washing a dish or my hands or whatever, I have to wait upwards of 20-30 seconds. Sometimes more. That might not seem like much, but it's *amazing* how much water is actually being wasted during that time 

-the dreaded 'cold-water sandwich' as my trades call it. You turn on the hot water in the kitchen to wash a few dishes. You then turn the tap down or off for just a moment to grab those dirty pots on the stove. You turn the tap back on to hot to continue washing and you're met with another round of ice-cold water while you wait for the unit to kick back on. I've heard that this is because some (all?) units require a certain flow capacity to be running consistently in order for the water to be heated. Again, wasted water while you wait for the hot stuff. 

Yes, you can purchase recirculation units and have them installed so that they're a fresh supply of hot water at a moment's notice. Yes, you can even purchase a holding tank that keeps a batch of hot water waiting for your beckoning. But you know what? If your tankless water heater requires a tank for it to be effective, why bother? 

For me, personally, it hasn't been worth it. AT ALL. I don't feel that my saleperson that touted this unit did an adequate job of disclosing the above-mentioned issues and frankly, *I* didn't do a good job of doing my homework prior to spending an arm, leg and torso. 

***This is information taken directly from a company's website that sells the recirculation pumps http://us.grundfos.com/products/find-product/comfort-pumps-up-10.html: 

*"Significant water (and sewer) disposal savings, retaining the 12,000 to 38,000 gallons of water a typical U.S. home wastes annually waiting for hot water. Some fast-growing counties are making the installation of hot water recirculation pumps mandatory for all new construction projects."* 

Guys, that's *typical* US homeowner. Does a *typical* homeowner have a tankless water heater? Probably not. If the typical Joe Schmoe is wasting upwards of 38,000 gallons a year with a regular hot water tank, it makes me shudder to think what I'm wasting. If all of this information is true, it should come MANDATORY. Period. New construction or not. 

If I had to do it again, I'd buy a bigger heater and wrap that sucker in insulation."


Do you have a tankless water heater?  Are you considering it?


Friday, May 10, 2013

And Then There Was One

This post is brought to you by the man of the house, John.  
Let's give him a warm, Elephant Buffet welcome!  


With a deathly level of seriousness, Carol tells me she has something to confess. 

"I did something stupid today, and it's been killing me trying to figure out how to tell you," she says.  She takes a deep breath, "I drywalled your levels into the bulkheads above the cabinet today."

I laugh, relieved it's something so small, but then a little detail nags my attention.  "Wait.  My lev-ELS?" I ask.  "Not just my level?"

"No," she replies, "There's two of them up there.  But not your good one.  That's still in the garage."

I let it sink in; my trio of levels had turned into a solo act with one stroke of a putty knife.  And though my "good one" was more expensive, it wouldn't have won the Sophie's choice of levels, had that scenario ever been raised.  A little voice tells me to look on the bright side.  It could be worse.  All three of my levels could be stuck above the cabinet, forever silently ensuring the alignment of that one wall.

I look up at the bulkhead, considering the necessary search-and-rescue.  Nothing short of a hole in the drywall would do.  And after all her work, I'm just not prepared to ask Carol for that.

So.  There is not one, but two levels up in the bulkhead above the cabinets.  Adding to the stories which makes the house a little more "ours".