Showing posts with label renovations. Show all posts

Monday, September 8, 2014

Welcome To Our New Pantry

Oh, hi there!  Do I know you?  Have we met?  Oh, right.... way back in December we spoke about fancy wreaths and crafts and such.  Then I kinda bailed for about eight or nine months.  But let's not talk about that.  No use living in the past.  Today, I'd like to introduce you to my new best friend.  She's practical and good-looking.  Two very important qualities in a bestie in my opinion.

Ladies and gentlemen (?), let me introduce you to my pantry:


Whenever I walk past I hear Stevie Wonder singing softly in the background.  Yes, Mr. Wonder.  She's totes lovely.

No 'reveal' post would be complete without a horrific 'before'.


Ummm.... yeah.  I originally didn't want to show this photo.  It's full-on Hoarders, I know.  The funny part is that this was only concealed from my kitchen by a a pair of curtains I temporarily (for a year) hung.


People would come over and sit in the kitchen and casually ask what was in there and I'd break into a cold sweat.  It was like the scene from the Wizard of Oz - "Pay no attention to that man behind the curtain!"   What curtain?  I don't see anything!  Here! Have more coffee!  Some quinoa salad or something!  Look!  Elvis!

The WORST part was when the boys had friends over.  For some reason, every kid that entered my house insisted on playing hide and seek in that damn pantry.  They'd go running for the curtain not realizing that they were about to run right smack into twelve bottles of ketchup on the floor and six ceramic pie plates I bought on clearance for future Christmas gifts.  Ha.  Joke's on them.  That'll learn 'em.

I knew I couldn't go on like this any longer.  We needed some semblance of organization and it needed to happen STAT.  When we demo'ed the kitchen this past summer (complete kitchen post comin' atcha), we saved every scrap of 3/4" plywood we could with the hopes of reusing it later.  Well, later was now.

I started by taking everything out of the pantry and randomly throwing it around the kitchen in the most haphazard way possible.  That always lowers my blood pressure.


We found lots of hidden treasures - like a Tupperware bowl full of peanuts that the boys proceeded to eat off of the floor like a couple of refugees.


Once I had it cleared out, I could assess the damage and figure out my game plan. I've been hoarding Adel cabinet fronts from Ikea for a couple years now and I've amassed a pretty impressive collection.


I figured out what doors I had, what cabinet frames I needed to buy to match them up and went from there.  One side of the pantry was exactly 36" wide and I had 36" drawer fronts already on hand (all but the top, little ones), so I chose the wide, deep drawers for storing things like lunch bags, cooler bags and miscellaneous pantry crap that never seems to find a home anywhere else in the kitchen.  I also had a couple 39" doors for the upper cabinets, so I purchased a tall wall cabinet to fit above the drawers.


There was a 6" gap to the left of the wall cabinet, so I built a little bottle holder out of scrap mdf and melamine-covered particle board to fit perfectly in that spot and to add a little storage at the same time.


Once I had that side roughed in, I could get to work on building some storage into the other side of the pantry.  John had the amazing idea to use an old hollow-core door to create the divider down the almost-center of that old closet space.


I opted to cover the doorknob holes with more scrap trim and just started building from there as my guide.  As you can see, I had to work around the hvac duct on the bottom - that posed a little bit of a challenge, but nothing a little scrap mdf couldn't handle.


The one thing that was causing my psoriasis to act up was that big opening on the back wall and how I was going to get that covered up and looking even with the rest of the paneling.  Up until that moment, my plan had been to paint out all of the fake paneling and give it a bit of a country cottage charmy feel.  In order to do that, I was going to have to buy another piece of ugly paneling (that isn't even sold anymore around here) for about $27-$35.  I was bummin' hard because I had my heart set on doing this whole pantry renovation with minimal costs and reusing as much as I could.  Then, John had the BRILLIANT idea to use some old wallpaper that I had been hoarding (just shut up, it obviously pays off) years ago on clearance from Lowe's.  The poor guy hadn't even finished his sentence before I was practically running to the garage to scout out a crappy piece of plywood to patch the big ol' hole in my wall.


I patched up the knots and the unevenness of the whole thing because it didn't match up perfectly with the wall on either side.  I read up quite a bit on whether I should prime the plywood first, use wallpaper size or just impulsively slap the wallpaper on with paste.  I'll let you guess what option I went with.  I figured the worst-case scenario was that the wallpaper wouldn't adhere properly and then I'd just redo it because it doesn't take a ton of paper in the first place.  So, I got to rollin' out my paper and matching the pattern.


Then, I drew a level vertical line on the wall, slopped on a crapload of paste and got to work.


Oh, man.  What a difference that made.  I wasn't sure how John would feel about the floral wallpaper but he seems to dig it just told me that it looks like "giant grandma curtains".  Let's be honest,  ANYTHING is better than what this pantry looked like before.

Keeping with the spirit of reusing what we have, I grabbed some shelves that were originally in the pantry/closet and some scrap boards to make the countertop for the drawer cabinet.


Once I got some trim sliced and diced and slapped some more wallpaper (beadboard style) on the ceiling tiles, this puppy really came together.


I have a couple more bits of trim and hardware to add and I'm still waiting for the top drawers to come in, but as of now, I think it's looking pretty sweet and way less hoardish.  It's been really nice to be organized for the back-to-school rush and routines. And for all of the hide and seek.

Friday, October 4, 2013

Inspecting The Uninspected (Part One)

Let's be honest here, unless you're - a.) in the process of a remodeling project b.) about to embark or just finished something ridiculous c.) a creepy stalker (hi! and welcome!), then this post is going to be completely uninteresting and much like my first Thanksgiving turkey.

Dry.


One of the many reasons posting has been eerily quiet around here is the incredible amount of hustle it takes to get a house (new build or renovation) to pass it's myriad of inspections.  When we originally applied and were approved for our building permit, we basically agreed to have all new materials and structures be built to town code.  For our particular project, this lovely list includes having an inspection for each of the following:
  • Readiness to construct (pour) footings
  • Substantial completion of structural framing
  • Roughing in of HVAC systems
  • Substantial completion of HVAC systems
  • Readiness to inspect air barrier (prior to cover)
  • Substantial completion of insulation, vapour barriers and air barriers
  • Readiness for inspection and testing of underground plumbing system
  • Readiness for inspection and testing of the water distribution system
  • Readiness for inspection and testing of drainage systems and venting systems
  • Readiness for inspection and testing of plumbing fixtures and plumbing appliances
  • Readiness to construct the sewage systems
  • Substantial completion of the installation of the sewage system before the commencement of backfilling
  • Installation of components required to permit occupancy
  • Completion of construction
On top of these FOURTEEN inspection requirements, we also needed to file for a permit with the Electrical Safety Authority and that usually involves an inspection of the wiring prior to covering it with insulation and drywall, and then a final inspection to make sure everything works properly and the fixtures are to code.


Here's the thing.  THE thing.  Before each inspection, I get nervous.  Really nervous.  Especially if it was an element that I had a hand in.  I take the work that I've done on this house VERY seriously and I've tried my very best to do each job damn near perfect or as perfect as I could possibly get it.  With a lot of this renovation, I've head to learn as I go.  Sometimes that means watching YouTube videos about how to install tile (and some that show you how to NOT do it properly), sometimes it means learning by having a massive failure.  Either way, one thing's for sure, if I knew the proper way to do something, that's the way I did it.  So, when it came time to have that which I *just* learned and implemented be inspected by a professional?  Oh, hell naw.... I get straight-up stressed.


I basically have spent the last 14 months in a constant state of frazzled-ness.  It doesn't do good things to the soul.  Or to wrinkles.


The reason I want to bring all of this up is because we've managed to cross off every single one of those inspection bullets with the exception of one.  The last one.  The big kahuna.  The final inspection.

And finally, to that, I can say:


Except I am, kinda.


So, for the next few posts, I'm going to go over some of the finer points of the inspection process.  Things to keep in mind and some of the things that I encountered.  The most important thing to remember here if you are going through this process and don't happen to live in the town of Kingsville, every town is different and building codes vary wildly.  Please, please do your homework when you're tackling a renovation.  Call your local building department and ask them to forward specific documents regarding your project or check their website for information.  Trust me, it'll save you from failing your inspections and having to go through the whole process all over again.  And again, that stuff just ain't no good for the wrinkles.


Wednesday, July 10, 2013

Tiling Shower Walls - a.k.a.: Instant Gratification

John wants me to call this blog, 'The House That Clearance Built'.  Not sure why......  could have something to do with this:


Or this:


Or possibly this:


But today, it has to do with this:


Yes.  Those are 8x16" textured tiles marked down from $4.12 to $1.00.  One dollar!  I was home, struggling with our new paint sprayer (as it turns out, I am *not* the 'paint whisperer' like I thought I might be) and John brought the boys out on a routine trip to the hardware store.  About 5 minutes later, I got a call  from him saying something to the effect of "Get here.  Now.  You're gonna wanna see this."

Oh, and I DID want to see that.

We were ALL OVER the sparkly, white tiles and we did some math and figured out about how much tile would be needed to do the guest bathroom shower walls.  There weren't enough tiles available in the clearance bin.  <sad song here>  Interestingly enough, there were some charcoal-ish grey tiles that were marked down and so we played around with a few patterns right there in the store and decided to go for it.

I've never tiled a shower wall before so to say I was a teeny, tiny bit intimidated would be an understatement.  I gathered all of my supplies, took a deep breath, and just dove right in.

I lined the bathtub with some leftover cardboard.
Hey look!  There's a level!
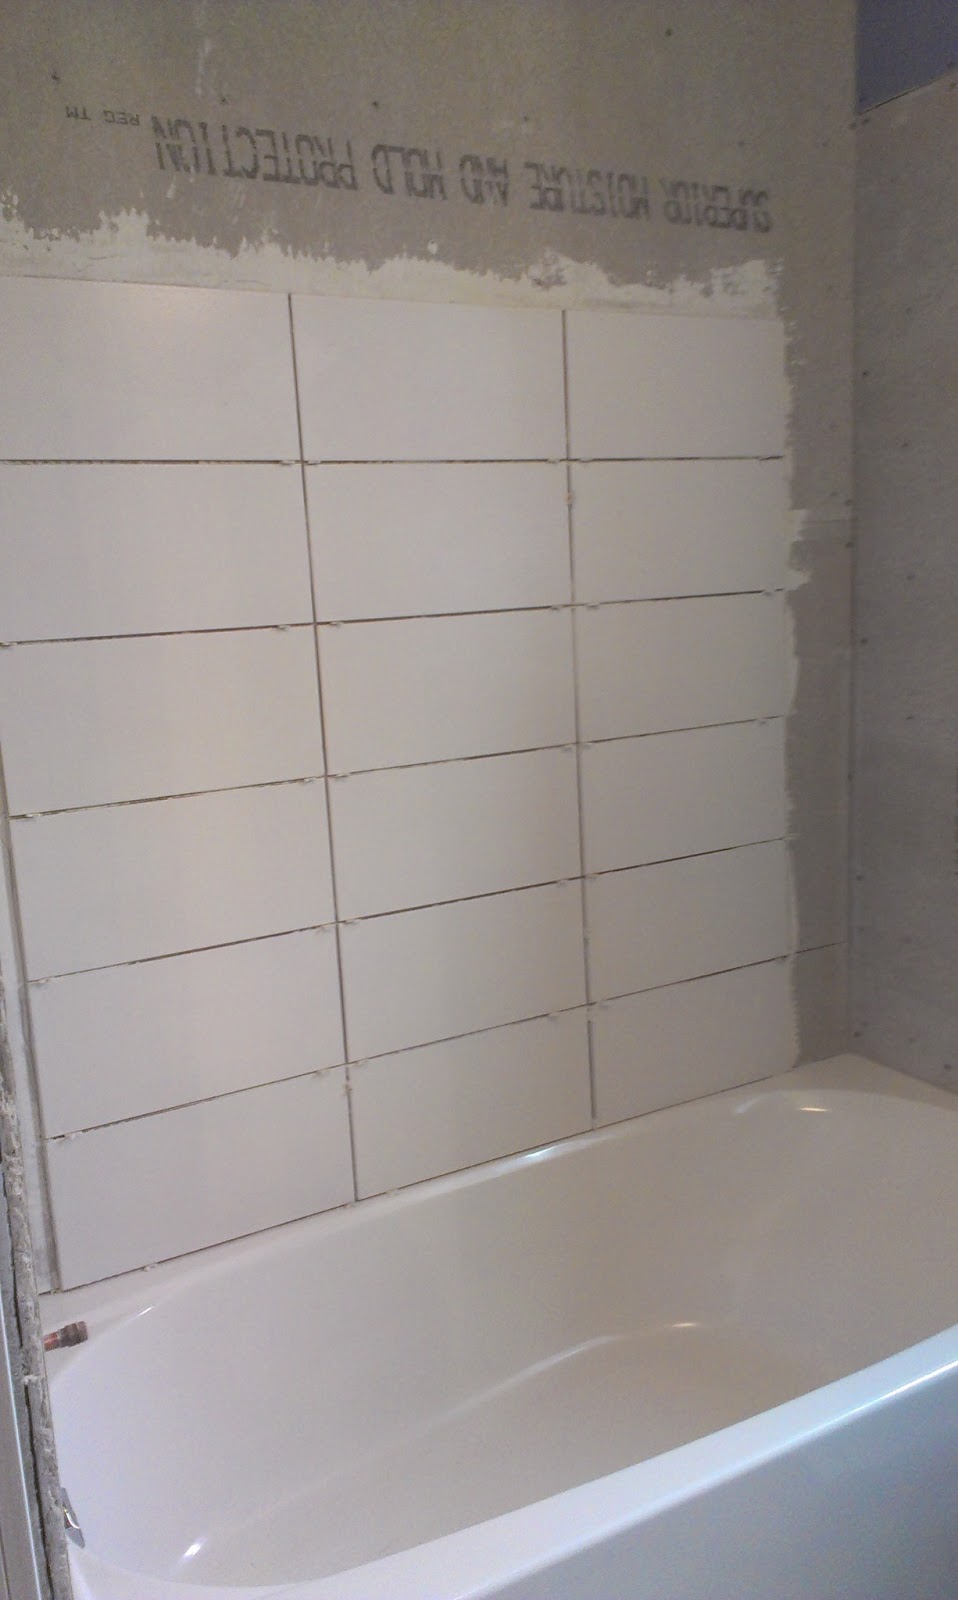
I start to get hives when things fall out of symmetry, so I marked my center line so I would know where to begin.  With white mortar, I mixed up a small batch to get started and spread a good layer of mortar onto the cement board with a notched trowel.  And proceeded to drop GIANT globs of thinset onto the cardboard-lined bathtub.

After a little while, I had this:


Talk about satisfaction.  I had been staring at that unfinished wall for a while and it felt so good to see it starting to take shape.  I let that first round of tiling set up for a while before I started on a grey band and the side walls.  Also, I ran out of white mortar and continued with grey mortar.  I figured that if I kept my joints somewhat clear, I wouldn't have too much of an issue with it coming through my white grout.


The corners required a quick snip on the tile cutter and for. the. love. of. pete. I kept chipping the edges of all of my cuts.  No matter what technique/method/wishful thinking I tried, the edges were chipping.  And I was quickly using up all of my 'just in case' tiles.  I ended up just taking the ones that were the least hacked up and using them - with the hopes that grout might help to cover up my sins.


Speaking of sins.

Remember how I said that I didn't think using the grey mortar would be that big of a deal?

It was a big deal.

I am neither neat, nor careful when it comes to mortar.  When I came back the next day, I had grey mortar crustily oozing out errwhere.  It was not in the least bit attractive.  And neither was the sight of me frantically trying to scrape out the surprisingly (?) cement-like bulges from all of my seams.  It was brutal.  And this was the best I could muster:


I was really and truly hoping that the grout gods would be forgiving and help me out with concealing this travesty forever and ever.  Amen.

They totally delivered.

This is just after applying the grout, hence the haze.
I have to say, I thought grouting would be way more fun.  It was stressful to me.  I was really concerned about the coverage and I suppose standing on the sides of the tub and reaching up as high as I could - overhead - didn't make it any more pleasurable.  I found that my hands were shaking and achy at the beginning, so I got some awesome (and handsome) assistance.


John jumped in and started grouting like a boss and I was able to follow from behind and make it pretty and uniform.  In the end, I'm pretty pleased with the result.


The finishing touch for this particular job was to add a bead of silicone to the perimeter of the tub where it meets the tile.  I had read that a good tip is to fill your bathtub prior to applying the silicone so that if there's any flex when the tub is full, you'll reduce any cracking or displacement of the silicone.

I placed a piece of scrap tile behind the running water to prevent any splashin' onto my pre-siliconed area.
A little bit of painter's tape and a nice, thick bead of silicone.


Remove the tape while the silicone is still wet and while the tub is still full and let that puppy sit for a while.


Once things are nice and set, drain the water and marvel at the awesomeness of it all.  I followed up a week later with some sealer and BOOM.


This is as clean as this bathtub will ever be.  Ever.

Saturday, May 11, 2013

To Tank Or Not To Tank.

(via)


A few months ago, Houzz.com featured an incredibly informative article geared toward people undergoing a whole-house remodel/renovation.  Some fantastic points were brought up, but there was one tip in particular about tankless water heaters that got me 'heated' up.  (How could I *not* go there?)

I'm embedding the article here because it was pretty sweet and it might help someone else in a similar situation.


Now..... on to the reason for this post.  Without a lot of research beforehand, we purchased a tankless water heater when we updated the furnace and air conditioning.  We were almost doubling our square footage and according to the HVAC peeps, we would need to upgrade our (already very old) units in order to pass the HVAC inspection and be up to code (I have my reservations on some of this information.  Do your research beforehand to be 100% sure).  Long story short: we thought that going with a tankless water heater, as opposed to our regular ol' run-of-the-mill tank water heater would be the fancy, dee-luxe apartment in the sky right thing to do.


Well.  Notsomuch.

Here's the edited and prettified version of my comments from the Houzz article.  Maybe they'll be informative for someone out there on the fence with whether or not to take the tankless plunge.

*****

"With regards to your first point ('Consider Water') I would *HIGHLY* suggest people do their homework on tankless water heaters. I chose a tankless heater based on all of the glowingawesomewonderfulunicorns! reviews I heard and I gotta say, I hate it. With a fervent passion. Like, I want to punch it. 

"Consider a separate tankless or tank heater for your second story, or a larger tank with a recirculation pump that keeps hot water right at your taps." 

Girl, word up to your mutha. 

In hindsight, I would have factored in a recirculation pump to my overall budget. But I didn't. So, for the time being, I deal with excessively cold water for excessively long periods while the tankless unit debates whether I deserve to wash my hands in warm water.

With regards to people saying that they're "much more" economical than the gas ones, I don't know how true that is. I think that in the long run, yes, you might save some money, but that's at the cost of: 

-your dishwasher not running properly due to the lack of immediate hot water 

-your laundry potentially not being cleaned properly. With two little boys at home, I have some MAJOR loads that need to be washed in HOT water. With high-efficiency washing machines that don't use much water to begin with, they certainly aren't getting up to temp to clean certain loads the way I'd like 

-unbelievable water waste. I used to turn on my shower and be able to hop in and adjust temp within about 5-10 seconds of having the water run down the drain. Now, whether I'm showering or washing a dish or my hands or whatever, I have to wait upwards of 20-30 seconds. Sometimes more. That might not seem like much, but it's *amazing* how much water is actually being wasted during that time 

-the dreaded 'cold-water sandwich' as my trades call it. You turn on the hot water in the kitchen to wash a few dishes. You then turn the tap down or off for just a moment to grab those dirty pots on the stove. You turn the tap back on to hot to continue washing and you're met with another round of ice-cold water while you wait for the unit to kick back on. I've heard that this is because some (all?) units require a certain flow capacity to be running consistently in order for the water to be heated. Again, wasted water while you wait for the hot stuff. 

Yes, you can purchase recirculation units and have them installed so that they're a fresh supply of hot water at a moment's notice. Yes, you can even purchase a holding tank that keeps a batch of hot water waiting for your beckoning. But you know what? If your tankless water heater requires a tank for it to be effective, why bother? 

For me, personally, it hasn't been worth it. AT ALL. I don't feel that my saleperson that touted this unit did an adequate job of disclosing the above-mentioned issues and frankly, *I* didn't do a good job of doing my homework prior to spending an arm, leg and torso. 

***This is information taken directly from a company's website that sells the recirculation pumps http://us.grundfos.com/products/find-product/comfort-pumps-up-10.html: 

*"Significant water (and sewer) disposal savings, retaining the 12,000 to 38,000 gallons of water a typical U.S. home wastes annually waiting for hot water. Some fast-growing counties are making the installation of hot water recirculation pumps mandatory for all new construction projects."* 

Guys, that's *typical* US homeowner. Does a *typical* homeowner have a tankless water heater? Probably not. If the typical Joe Schmoe is wasting upwards of 38,000 gallons a year with a regular hot water tank, it makes me shudder to think what I'm wasting. If all of this information is true, it should come MANDATORY. Period. New construction or not. 

If I had to do it again, I'd buy a bigger heater and wrap that sucker in insulation."


Do you have a tankless water heater?  Are you considering it?


Wednesday, February 6, 2013

Evolution Of A Laundry Room

The laundry room/mudroom is far from done, but I think I'm on the right track.  Let's take a minute to show you what I started with:


I know, I know.  You're overcome with feelings of jealous rage, right?  I can't say that I blame you.  Who *doesn't* want a dimly lit, uninspiring place to do their laundry?

First things first, I needed to paint, install a couple wall cabinets, and ask John ever-so-nicely to hang a more practical light fixture.


Getting better.

I've been seeing black interior doors everywhere lately and thought it might add some much-needed contrast to the room.  Here's the 'before' of the back door leading to the garage.


During:


After painting:


Next, it was time to address that dang ol' OSB floor.  For those of you not familiar, OSB stands for oriented strand board.  It's basically a process by which various strands or flakes of boards are glued together and kiln-dried.  It results in an affordable and strong product that is most commonly used as flooring, walls and in the construction of roofs.  It might be strong, but it sure ain't pretty.  Time to cover it up.

I toyed with the idea of running the flooring that I was using in the rest of the house right up to the door, but I changed my mind at the last minute when I thought of the amount of snow that we bring in through that door during the winter.  That spot gets soaked.  In the spring, summer and fall when I'm working on the landscaping I track in so much mud it's almost scary.  Plus, I wanted to do it quickly and most importantly, on the cheap.  I decided to keep costs crazy low and go with a vinyl floor tile.  I'm planning on putting in a stone tile for that area in the future, but for now, I just needed something (anything!) other than that OSB.

I found a nice 18x18 concrete-look tile at Lowes and started the process.  The first step was to prime or seal the floor.


Done.  The next step was to let it cure.  Really?  Oh, come onnnnnnnnn.  I don't have all day for this!  The floor there is unimaginably cold.  I set up a little space heater to help the process along and after an hour or so, started laying tiles.  As a word of warning, I would advise AGAINST doing it the way I did.  The primer/sealer definitely needs adequate time to cure on a room-temperature floor.  

I laid out my tiles to see where I wanted the seams to end up.  I knew that I wanted them to overlap the subfloor's seams, so I started there and worked my way out in an offset pattern.


Once I was satisfied with the layout, I started peeling and sticking.


After every tile, I did a little bow-legged dance to really press it down and secure it to the floor.  The instructions said to use a 100lb roller and since I'm just a smidge over 100 pounds (shut it) I figured sliding around on it would do the trick just as well. 


After a few minutes (literally) I had this little section finished:


This was one of those super-fast projects that offered immediate gratification and I honestly think I need that once in a while.  It can be a real challenge to stay excited about the billions of other projects that I have to do all over this house and having a quick one to get out of the way totally helps.

Once the flooring was down, I put down an equalizer strip and then it was time to bang out the laundry counter.  Surprisingly, I took almost no pictures of this process.  I think I just got into a zone and got to work.

I started with laying out a sheet of 1/2" plywood along the length of the area that I wanted to cover.


The sheet was *exactly* 8 feet long.  That meant that I wouldn't be able to clean up the edges like I wanted, but I planned on added a bullnose the same way I did with the built-in bookcases before.

I made two support/base units out of MDF and fit them over the washer and dryer.  I made sure that they didn't actually touch the washer or dryer since the washer really gets hoppin' along when it's on its spin cycle.  I didn't want to risk damaging the base units or the counter with all of the jiggle wiggle.  These units will also be attached to the end wall, as well as the back wall this spring when we re-route the ducting for the dryer and slide the whole counter back.


While I worked on the units, I also worked on finishing the board and batten in that area - and this is where we are now:


Sorry about some of the glare-y shots.  I took some daylight ones that were just meh.


There's still quite a bit to do in this room (hello, glaring dryer plug) and I'll post a 'Review and To-Do' on this room later.  For now, let's take a quick look at that 'before' one last time:


Whew, glad the hard part's over!