Showing posts with label before and after. Show all posts

Thursday, August 29, 2013

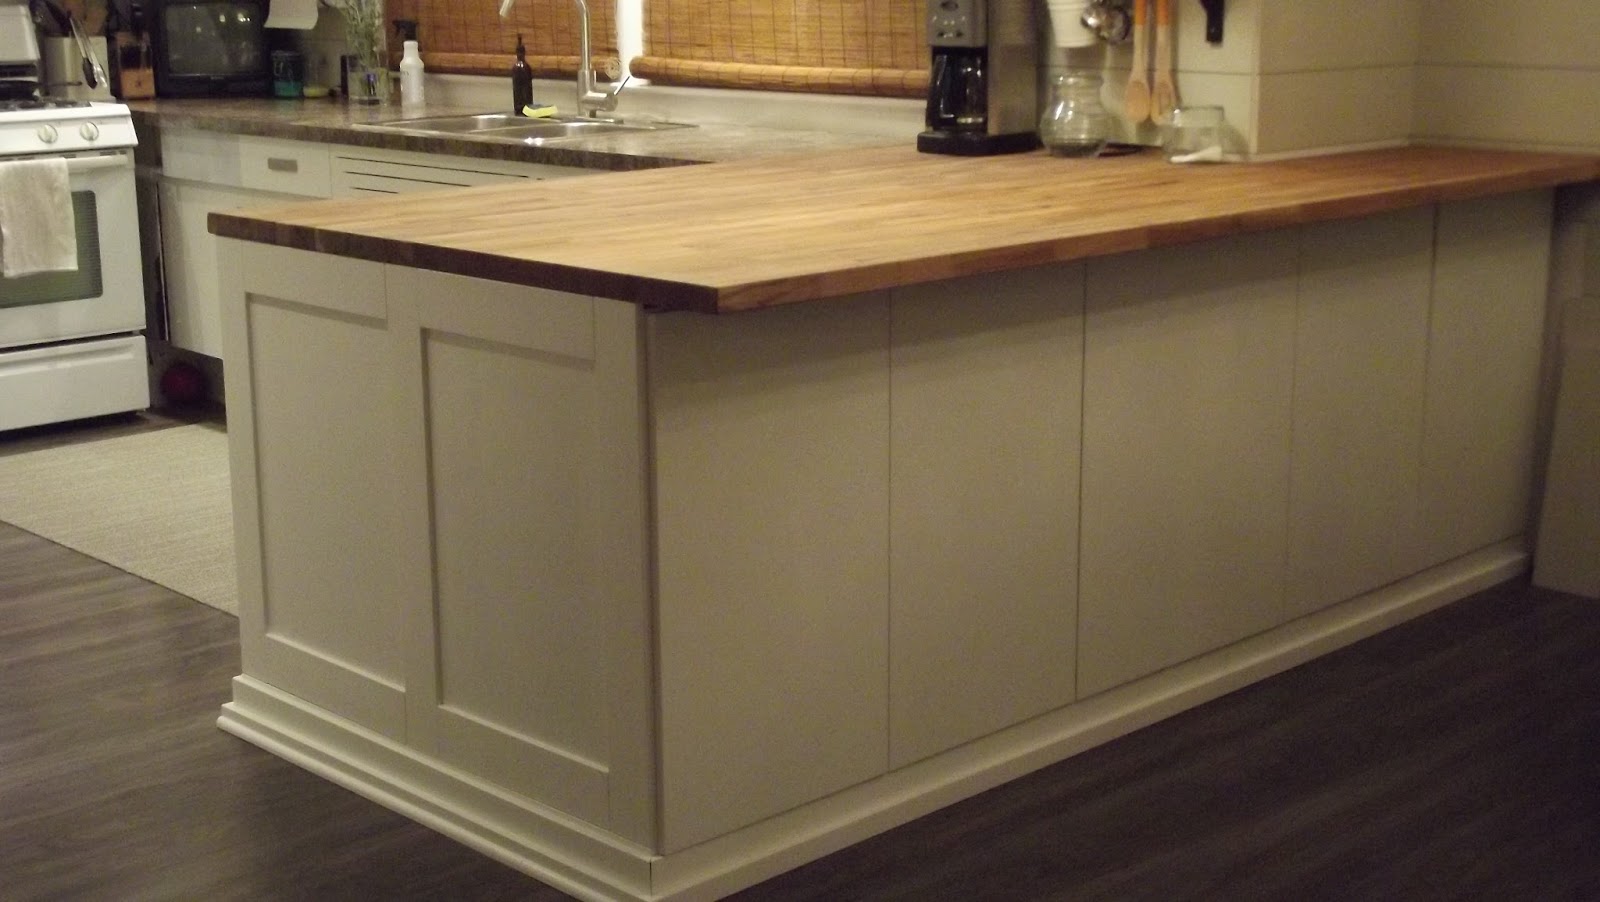
DIY Butcher Block Kitchen Island (Before and After)

I just spent 72 hours writing the LONGEST post ever about this kitchen island and I lost. every. single. word.  Every last one.

I think Jack's most recent school photo accurately sums up how I feel right now.


<deep breath>

So, let's take that as a sign to just skip to the before and after, yes?

Before:


Not cool, Blogger.  Not cool at all.

Friday, August 16, 2013

A Bedroom For A Boy - Progress

When we last spoke, the bedroom in question was looking a LOT like this:


<sigh>

I've been watching episodes of 'Hoarders - Buried Alive' just to prove to myself that I didn't have a problem.  This room has had become the catch-all throughout the renovation process.  A life-size junk drawer, if you will.  Someone's coming over to visit?  No problem!  Open the door, literally throw something in, shut the door.

No more.....


That, my friends, is the result of six billion flights of stairs.  Almost every single thing in this upstairs bedroom belonged in the basement.  A basement that needed to be reorganized in order to accept the influx of *stuff* that I was about to introduce.  So, not only did I need to clean out the entire basement, I needed to clear out this room, as well.  You'd think I would have thinner thighs by now...

In order to get to this point, here's what had to happen:
  • Trim out the windows
  • Caulk all trim around said windows
  • Paint the jambs and trim
  • Two coats of Benjamin Moore 'Revere Pewter' mixed in Behr Premium Plus, eggshell finish
  • Install baseboards and craftsman-style door casings
And that's where I'm at.  I have seven days before this puppy needs to be birthday-boy ready.  Here's what's left:
  • Caulk and paint floor and door trim 
  • Hang artwork
  • Decide on room layout
  • Bring in furniture (desk, shelves, night table, lamps, etc)
The shelving that you see in the room right now is simple, cost-effective (read: super-cheap) shelving from Ikea.  Once assembled, it looks like this:

Once you spend an hour in the hot garage with a can of brain-cell diminishing dark walnut stain, it looks like this:


I have a couple options as far as placement of the shelves go--- and I really don't know which one I prefer.  I can go one on either side of the window, like so:


Or, I can gang them up between two windows and they would be the first thing you see when you walk up the stairs or past the door:


I think I kinda like them ganged together like this and I'm imagining white, soft, full curtains on either side of the windows to really lighten up this wall and create a welcoming effect.  However, once you bring in the bed where I wanted it, it doesn't leave much walking space:

The tape measure shows exactly how far the bed would extend.

The room has a funky, little bump-out that I was hoping to tuck the headboard into and extend into the room.


Now, excuse me while I dazzle you with my ARTISTIC rendering of Jack's bed in this space just to help you understand what I mean:


You're floored.  I know.  I gots mad Paint skillz.  Don't hate.

So that's where we are right now.  No decisions on room layout, but I'll get that figured out in the next couple days.  Any thoughts?  Recommendations?  Would you like me to offer tutorial classes on how to illustrate in MS Paint?

Wednesday, February 27, 2013

A Little Bit Of Column A (Before and After)

It's like I'm having a contest with myself to see how long I can go without posting.

I win.

I'm dealing with a gross cold so this post is coming to you whilst inebriated with NyQuil.  Lots and lots of NyQuil.  I'm dead serious.  I've only gotten off of the couch about eight times today.  Most of which was to crawl about ten feet over to the landing in an effort to finish staining and poly-ing the stairs.

I'll try to make up for the last few weeks with one obnoxiously long post.  You're welcome.

One of the biggest and ugliest challenges with this whole-house reno has been the dreaded posts at the base of the stairs.


It's beautiful, right?  Don't you want one, too?  The scary-ish thing about these posts is that they're primarily responsible for keeping the second floor on the second floor.  It still boggles my mind that a handful of 2x4's can transfer that much weight.  Sure, there are other points within the house that help to transfer weight from the giant yellow LVL beams, but they're hidden and I don't see them every single day.

I knew I wanted to create stately, dramatic columns, but frankly, I've never really done it before.  I've played with moldings and trim to come up with some pretty profiles before, but this was new territory for me.  I pinned my heart out with images of columns and bases to get my brainz wrapped around how I was going to tackle them, but I was considerably freaked-out at this project and I let it sit.  Until just a couple weeks ago. That's almost five months.  Five months of yelling "Don't touch the posts!!! You'll get a splinter!!!" every time the boys hung onto them like a firepole.

Enough was enough and it was time to just dive the heck in.  But there was one step that needed to be completed before I could start:  I needed to address the landing issue and the lack of flooring on said landing.

We were originally planning on carpeting the stairs and landing but I nixed that idea mid-stream, leaving me with a REALLY rough starting point.  I didn't want to lay the floating flooring down that I was doing on the rest of the house because I thought it would clash with the steps going up and look ridiculous.  I thought about just painting the plywood and calling it a day ("You're a DAY!") but I knew that would look cheapo.  So, I came up with a plan to lay some faux painted plank flooring.  Although, I don't know if it's really faux.  It's wood.  It's cut in planks.  It's painted.  It's faux sho' on the floor.  So, technically, it's the real deal.  Right?

John ripped a sheet of 1/8th-inch plywood down to four-inch strips and I got to work gluing and nailing them down on the landing.


I used two dimes at either end for spacing because I wanted to keep a visible seam after I painted.  I also added a piece of 1x2 mdf on either side of the landing as a sort of bullnose to mimic the profile of the steps.


And then I got to painting.


I like the idea of possibly doing a decorative paint treatment on the landing, but the rustic charm of the plank floor looks pretty sweet as-is.

Back to the columns.  Did you forget about them?  Are you still with me?  ...tap, tap, tap....  Is this thing on?

Now that the landing had flooring, I could get started on those damn posts.  I started by sitting down and staring at them.  For a long, long time.  Then I dug through my mdf scraps and got to work putting together my column puzzle.


Creepy, blue tint courtesy of my awesome camera skillz


And in the almost-end, I have this:


I added a funky 'X' detail to the outsides of each column.
They'll tie in with another project I have in mind for the kitchen.


I still have a few bits of finish work to do before I call the landing complete:

  • Caulk, caulk, caulk and add a final coat of paint
  • Finish the risers for the bottom stairs
  • Add a coat of poly to the landing
  • Finish the trim for the outside of the landing
  • Change out the almond-colored receptacle for a white one
I'll do a 'final reveal' post soon with all of the finishing touches once I get over this stinkin' cold and muster the strength to get off of the couch and actually do the items on the above list.  For now, I'll just stare at all of the hard work that's finally behind me.

(Linking up to YHL's fantastically awesome 'Pinterest Challenge'!)

Monday, February 4, 2013

Another One Bites The Dust - Part I (Before And After)

The dust is still settling on my most recent project.


In an effort to officially occupy Wall Street my house, one of the town's parameters is that my addition/renovation meet certain criteria.  One of those criteria is that the flooring be impermeable to water.  'Impermeable to water' can count as carpet, tile, sealed wood flooring, paint, etc.  Pretty much any flooring you can think of is acceptable.

I've been staring at a carpeting swatch for the upstairs hallway for a couple (or maybe it's been a few) months now knowing that we've budgeted to order it in the spring.

But I got a little antsy this morning.  Shocker.

It started with filling the gigantic cracks and knot holes with several types of filler.


Why several types?  Because I had an assortment available to me and I was just runnin' through 'em.  I started with wood filler, moved on to a larger gap filler (keep your mind out of the gutter), then finished up with a plain old spackle compound.  My goal wasn't to do a perfectbeautifulawesome job.  It was to cover the damn floor because guess what?  It sucks getting splinters in the middle of the night.  For realz.

And then, while I waited for the the fillers and spackles to dry, I did the unthinkable.

I went on Pinterest.

And searched 'painted floor'.

The heavens opened up.  Unicorns sprung from rainbows.  Fairies sprinkled glitter all over the land.


Okay, can you believe the yellow and white flowers?  Seriously.  Seriously.

Remember how I said it wasn't going to be perfectbeautifulawesome?  Oh, it was on now.

But, like all good things, everything has to happen in steps.  I'm learning every day that awesomeness comes in layers.  I immediately regretted my first two layers.  I wish I would have spent more time filling in all the gaps and cracks a little better,  But, I didn't.  I wish I used a better first coat of paint.  But, I didn't.

Moving on.

I took my trusty palm sander and 100 grit sandpaper and got to work.


I went over every inch of the hallway and the haze proves it.


I swept things up, ran the vacuum and got ready to be locked out of the hallway for a couple hours.


{Hey, don't mind that bookcase.  Pretend you don't see it.  I planned on writing about how we built it later this week.  Act surprised when I show you.}

After one coat of paint, this is what I have to work with:


I'm undecided with the design that I want to paint on the floor. It's like a giant, blank canvas.  By town code, it officially satisfies the occupancy guidelines, but now it's time to take it up a level. Thoughts?  What would you do?  It's definitely an upgrade from it's previous life:


What's left to do in the hallway:

  • Hang guest bedroom door
  • Hang bathroom door
  • Paint all doors
  • Finish installing baseboards and trim
  • Paint a spectacular pattern on the floor
  • Hang additional artwork
  • Figure out what to do with the awkward nook on the other side of the column

What about you?  Have you ever painted a floor?  Any success or horror stories?

Friday, February 1, 2013

If You Build It, They Will Use It (Before and After)

Let's talk about big bangs for your bucks today, shall we?  Would you believe me if I told you that this built-in bookcase cost less than $50 to build and only took me an afternoon?


Well, believe it!  Let me break it on down for you.  Here's what I started with:


This is the wall separating the dining room from the Florida room sunroom family room.  Prior to demolition/renovation, there was a window on this wall.  In an attempt to open the spaces up a bit more, I chose to turn this wall into a half wall and planned on making a ledge or counter along the opening.  I liked the idea of a display space between the two rooms.

But it still felt a little too dinky as a ledge.  It needed more girth, I tell ya.  When you enter our house from the garage (which is the main way we enter), this wall is the first thing you see and I wanted it to be a little more inviting than just a half-wall with a 5-inch ledge perched on top.  And that's how the bookcase idea was born.

Using the existing wall as the back of my bookcase, I cut 5 boards and drilled three pocket holes in each with my Kreg Jig.  I also attached horizontal front stabilizers to support the vertical boards and keep them from moving around while building.  I left the pocket holes exposed on the front for two reasons: 1. It's way easier to drill from the front 2. I was going to wrap the bottom in trim at the end and would be hiding this part anyway.


The wall that I was drilling them into was drywall affixed to a solid cedar wall, therefore, I didn't have to look for studs when drilling.  Bonus.

I cut four boards and popped them into the bottoms of each shelf section using quarter round molding glued and nailed in place, then added the bottom skirt of trim around the entire unit.  Once I got the bottom shelves in place, I figured it would be a good time to paint the inside because man, I hate painting individual shelves.


Here's where the picture-taking got a little sketchy.  Using a level and tape measure, I carefully marked off where to put the quarter-round molding pieces, added a bit of glue to each piece and nailed them on.  I didn't want the shelves to be identical in height, but I knew that I wanted the bottom to be taller to accomodate larger items, baskets, books, etc.

Once all the boards were in place, I attached the 1x2 bullnose pieces to the front with the nailgun.  This creates a much thicker profile from the front with the added bonus of providing strength to the span of each shelf.


I added a coat of paint to each shelf (Behr's Polar Bear in semi-gloss) and while that dried, I cut the top of my bookshelf in the garage.


I used a half-inch-thick piece of plywood (not sure if it's birch or beech) that I already had on-hand.  I used clamps, a straightedge and a circular saw to cut the top.  Then, to add the notches at the corners, I measured and marked off my cut lines and went to work with the jigsaw.


I added another bullnose around the perimeter of the counter, slapped on a coat of stain and about 5-6 coats of polycrylic later, I had a sleek countertop.


And that was it!  An afternoon of building and painting and I have a functional piece of built-in furniture.   The polycrylic applications were spread out over a couple days, but the building and painting only took a few hours.


Now I just have to fill it up with STUFF.  Once I get it styled all pretty, I'll snap a couple more pics and share them.

What about you?  Ready to break out your toolbag and tackle a bookcase?  Or are you ready to hire someone to do it for you?

Monday, January 28, 2013

She's A Brick......Wall (Before and After)

So the fireplace mantel was looking....... a little washy.  Matchy-matchy with them there walls.  And the concrete nothingness was even more apparent.


So, I grabbed some paint.  And I done painted.  And a somewhat magical thing happened.

(brick is Glidden's Unicorn White - the walls are Glidden's Shadowbox)
The old concrete voids just kinda.....disappeared.  Prior to painting, I was stressin' about how the heck I was going to make fake, little brick façades.  I was scheming to use some 1/4 inch mdf, beat them up a little and then adhere them to the wall.  But you know what?  Not on my radar right now.  Painting out the wall really helped to shorten my 'to-do-now-because-it's-driving-me-nuts' list.  And that, friends, is a good thing.

However.

Can we just say b-o-r-i-n-g?  That's the most neutral wall in the history of neutral walls.  I could feel the above-mentioned list lengthening.

Every time I sat down on the sofa, I looked at that wall and thought 'it needs something --- some contrast'.

And then John and I got the flu.

So I had to stare at that wall a little longer.  I couldn't move.  I was so tired and miserable and gross.  But my DIY blood is thicker than influenza.  I don't know if that makes sense.  I marched out to the garage (in my pajamas - in the middle of the day), grabbed my trusty Kreg Jig and got jiggy wit' it.


("You got a - Prada - bag with a lotta - stuff in it - give it to your friend - let's spin")

While I was in the garage, I grabbed my Kreg, a bigass mirror and some pine 1x5 boards and got to work.  In between coughing fits.

Here's my Kreg that John jigged up for me.  Get it?  Jigged?  Forget it.....  

The writing on there says,
"Make me something pretty.  Love, John"
I mitered the boards and then drilled pocket holes on two of them.  A small bead of glue and some 1.5" Kreg screws later, I had a simple frame.


I carefully laid the mirror face-down and added some mirror clips.


One I screwed all the clips in, I said a prayer and turned the giant behemoth of a mirror over.


Whew.  That was hard.  Now it was time to get to the 'contrast' part of this project.  I taped off the mirror and applied one coat of Minwax's Dark Walnut stain.  

It's like a little miracle in a little can.
A couple things to note:  

1. Wear gloves.  This stuff is stain.  It will stain everything it touches.  Including your hands.  And you'll look like you have a strange case of reverse-vitiligo when you pick your kids up from the bus stop.  

Ask me how I know.  Dammit. 
2.  Crack a window, would ya?  Ventilation is a must with this product.  Whenever I stain something, John *always* walks in the door and says, "It smells like death in here."  It never fails.


After a single coat, the mirror looked like this:


Now, had I not been sick, I might have remembered to stain the back of the mirror first.  Why?  When you put a frame up against a mirror, a small amount of the back side of the board reflects into the mirror.  I forgot to do this, even though I know better.  To get around it, I had to drip gobs of stain along the edges of the mirror in an effort to get the back of the board to soak it up and not reflect the light wood color.  It worked in most spots.  

Once finished with the stain, I did *not* let the stain dry fully and just slapped a couple thin coats of polycrylic on that bad boy.  You're supposed to let the stain dry fully.  Mama don't got that kinda patience.

Once the polycrylic was barely dry to the touch, I whipped it up on the mantel and reclaimed my place on the couch to continue being flu-ridden.  This time, with a much nicer view.


Now, I'm itchin' to put some art up on the wall to the right of the mirror.  Maybe some subway prints?


TDC Before and After